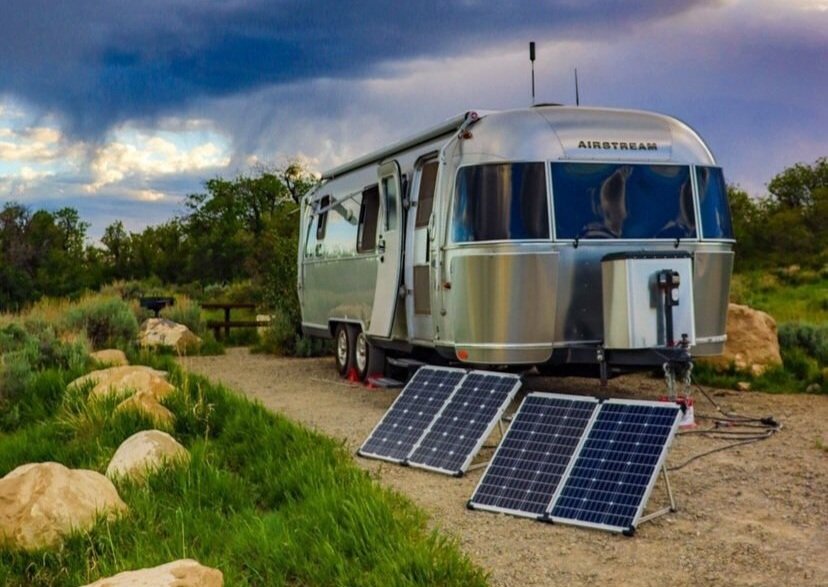
Installing an RV solar system is a fun project that will enhance your camping experience for years to come.
When mounting solar panels on our RV, there are a few big decisions to make at first. Such as, whether you want flexible or standard solar panels, best placement for the solar panels to get the most sun, how to wire RV solar panels, and exactly how I wanted to mount the solar panels to our roof.
It can seem like a lot at first when doing a DIY RV solar install, but this article will walk you through those key RV solar installation decisions in an easy and simple way.
In this RV solar install guide you will find:
-
How to mount solar panels onto your RV
-
Whether to wire your solar panels in series vs parallel
-
Corresponding RV solar wiring diagram
In part 1 of this RV solar series, I outlined the basics of how an RV solar system works and helped you estimate the size of your components based on your power needs.
Next, we determined the best RV solar setup based on your budget.
If you are new to RV solar, I suggest that you spend a few minutes reading through those posts before continuing how to mount your RV solar panels.
Install Solar Panels on a RV
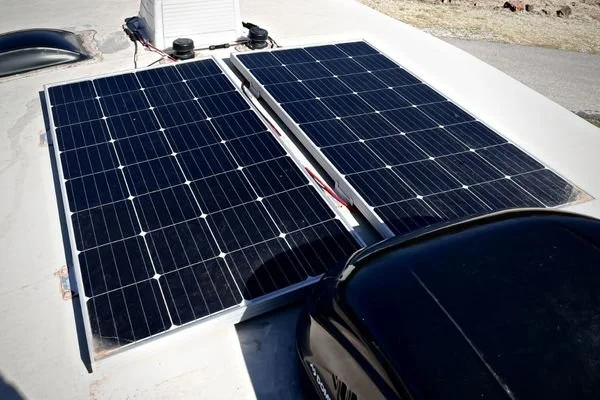
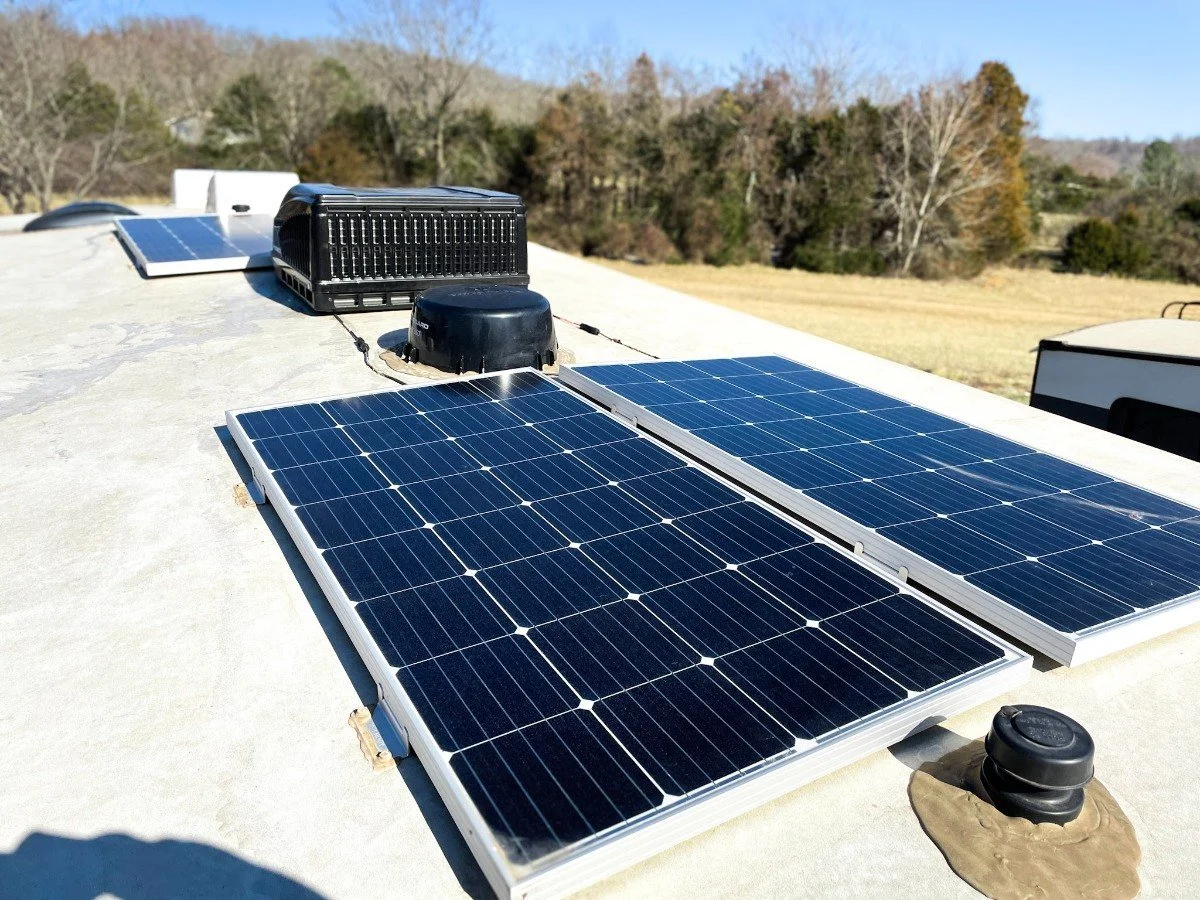
The first major decision you have to make regarding your RV solar installation is how and where you want to mount your solar panels.
Drilling holes into the roof of your RV is a serious endeavor, so you want to make sure you get it right the first time.
While you don’t have to worry about drilling holes if you are using flexible solar panels, you still want to plan out a few scenarios of where you may place your panels for best efficiency and durability.
Keep in mind that every RV roof is different. The solar panel array that worked for your friend might not work for you.
Before you purchase your panels, take detailed measurements of your RV’s roof. Make sure you account for any vents, A/C units, or other items on your roof that could get in the way of mounting your panels or shade the solar panels.
I drew a diagram of our entire roof with measurements for every potential place I could arrange our four solar panels.
Also, if your roof has studs, include them in your drawing. It is best for you to screw the panels directly into the studs to make them as sturdy as possible. The last thing you want is to have a solar panel fly off your roof while you are traveling down the road at 60 MPH.
Once you decide on the positioning of your solar panels, you will want to make sure you have all the right tools and supplies to properly secure your panels to your roof.
How to Mount Solar Panels on RV roof
Supplies for Mounting Solar Panels:
-
Renogy Mounting Brackets (1 set for each panel that you are mounting)
Steps to Mount RV Solar Panels to Roof:
-
Map out positioning of solar panels on your roof. Triple check that the panels will fit properly before drilling any holes into your roof.
-
Attach mounting brackets to each panel.
-
Set panels in place and mark where you need to drill holes. Make sure your holes will hit studs in your RV so your panels are secure. Each RV will be different, but the studs are usually visible with a 2-3inch wide grey line going width wise of your RV roof.
-
Drill small pilot holes into your roof where your brackets will be screwed down. Fill the holes with a little dab of the Dicor sealant to help insure that everything will remain water tight.
-
Line the bottom edges of each panel with butyl tape and put the panels in place. This will add a level of security to your panels to avoid them flying off.
-
Attach panels to roof using the screws from the mounting kit.
-
Apply a generous coat of Dicor sealant on top of and around the mounting brackets to seal everything off from the weather.
How to Wire Solar Panels: Parallel vs Series
Now that you have mounted your solar panels, it is time to start wiring them. There are three main ways to wire solar panels into your RV solar system:
-
Parallel – each panel is wired into the charge controller separately
-
Series – all panels are connected together and then wired into the charge controller
-
Series-Parallel – a mix of series and parallel where solar panels are “grouped” together and each group is wired into the charge controller
Each solar panel array has pros and cons that you should weigh when making your decision. Let’s walk through each array in more detail so you can determine which setup will work best for your needs.
Wiring Solar Panels in Parallel:

When the positive and negative wires from each solar panel are grouped together, this is referred to as wiring them in parallel.
Wiring your solar panels in parallel allows each panel to operate on its own. If one panel is in the shade, the rest of your solar array will still be able to perform at max capacity.
Connecting your solar panels in parallel doubles the amperage and leaves the voltage unchanged. Because wire gauge is limited by amperage, solar panels wired in parallel require higher gauge wiring.
I recommend that you do not wire you solar panels in parallel for units over 500 watts because of the very thick and expensive wires that you would need to buy to make it efficient.
Wiring Solar Panels in Series:

When the positive wire of one solar panel and the negative wire of another panel are connected together, this is referred to as wiring them in series. In essence, you are creating one big panel with multiple smaller panels.
In a series solar panel array, your output will be limited by the lowest performing panel. If one panel is in the shade, all of the other panels will be taken down with it. This is the major downside to wiring your solar panels in series.
Connecting your solar panels in series doubles the voltage going through the wires while leaving the amperage unchanged.
The low amperage created by solar panels in series allows you to purchase low gauge wires (thinner and cheaper).
On the other hand, charge controllers are limited by voltage, meaning solar panels wired in series will need a more expensive charge controller.
Wiring Solar Panels in Series-Parallel:

Due to the limitations of both series and parallel solar panel arrays, the most common array for larger systems is series-parallel and I highly recommend this setup for most RV solar systems.
Wiring your panels in series-parallel means that you have multiple series that you wiring in parallel.
For example, if you have four solar panels, you could have two sets of two panels. While one series might be wiped out due to a panel in the shade, the other series can still perform at max capacity.
For a four panel array wired in series-parallel, you double your amperage and your voltage rather than quadrupling either.
This allows you to limit the gauge of your wires and limit the size of your charge controller. We chose to wire our panels in series-parallel because we found it to be the best balance of cost and system efficiency.
Next Steps: RV Solar Setup —
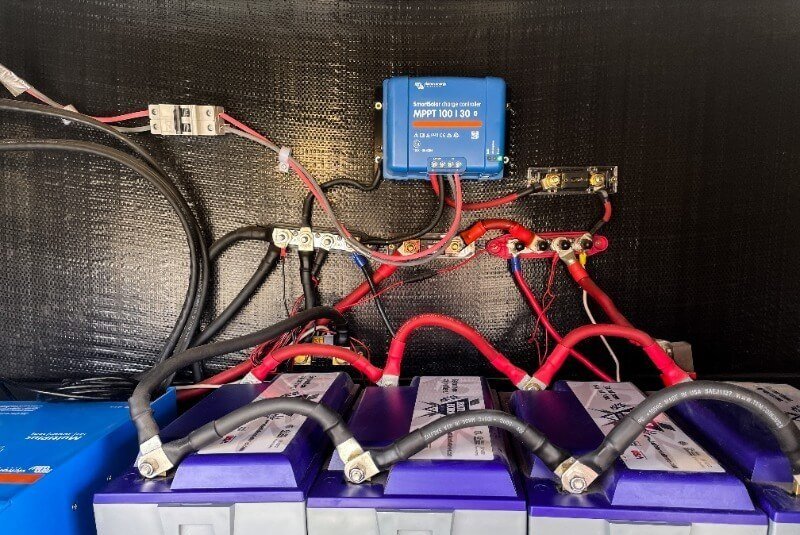
Once you have the easier part down of mounting your solar panels to your RV and wired to your liking, you’ll want to decide where to run your wires down to meet your charge controller.
The charge controller is where the solar energy will be converted to 12V power and stored in your RV batteries.
Please reach out in the comments below or contact us page if you have any specific questions about buying, mounting, or wiring your RV solar panels.
Related: RV Solar


I have a 2018 Jayco Talon that is pre wired for solar:
What doe’s that mean, already wired with a coupler on the roof and front for a portable, I see a loop of wires just above the pair of battery’s next to the battery storage under the front to f our fifth wheel? I better check with Jayco and see if they have any drawings and such.
Mike
Should you use some sort of a safety line in case one of the solar panels were to come loose while moving?
Thanks!
Interesting I found this. Yesterday as I was drilling starting holes for the screws on my TT I was shocked to realize how thin the roof was. On one end of the solar panel, I even drilled down into what I could see were joists or beams underneath and still not solid. So today my thoughts were to secure it with wire or rope to a vent or something until I feel comfortable with it driving down the highway. Or maybe just keep it tethered for peace of mind.
Thanks read every single one of your articles I was not looking forward to solar seems so complicated! I am at ease now going with Renogy 300watt kit for my class c! Only worried about drilling wholes in my roof 😅 that feeling probably won’t go away till it in! Thanks again!
I’m happy you found the articles useful! I love Renogy products. You are making a great choice. Drilling holes in your roof is scary, but you will be fine as long as you plan properly and make sure to use plenty of sealant.
I have a 2018 Riverstone Legacy that was not prewired for solar. How to you run the wires to conect everything? By the way, your article was super informative.